What is an Inline Player or Flow
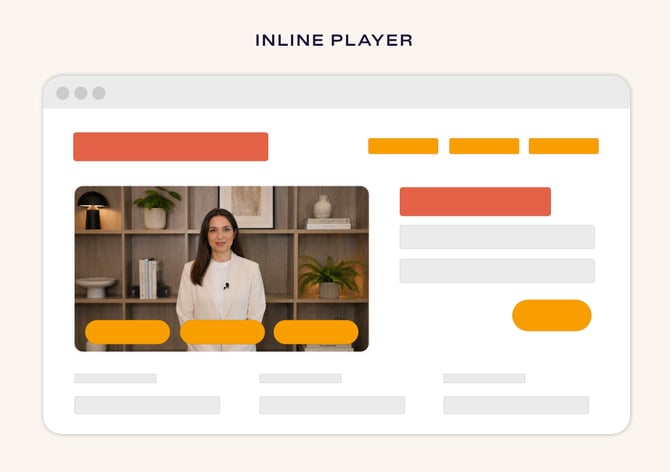
A ReelFlow Inline Player is designed to appear in the body of a webpage, where other content and page elements sit around it. It's perfect as where the video experience is the focal point of a page section, appearing front-and-centre.
How it works
Once you have installed ReelFlow on your website, you can publish an Inline Flow to any page, usually without adding any new HTML or requiring new code.
An Inline Player is inserted into a “Target Element” - a space you identify or create in the code of the page. These sorts of elements are often already present in the code, but if not, your web developer can help you insert one.
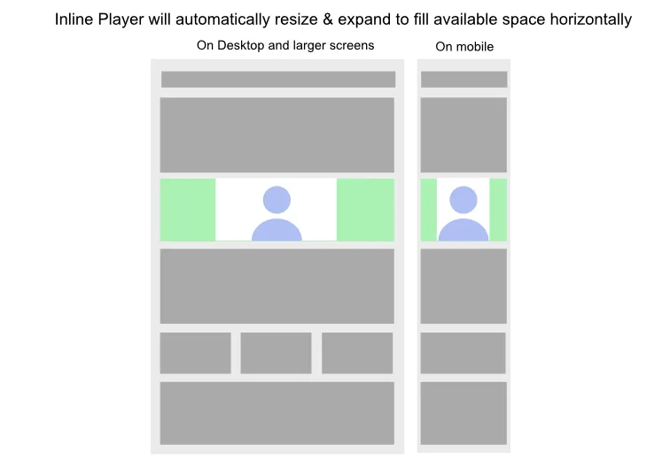
By setting the page and target element in the Flow Builder Activation tab, the Inline Player is displayed when the Flow is published. The Player containing the Inline Flow will attempt to expand to fill to the edges of the Target Element on the page.
You can see below an Illustration of how the Inline Player occupies space in the Target Element.
Before you start
Before attempting the following steps, the Player Install code must be present and working on the pages you wish to embed an Inline Flow. See ↗️ How to add the Install Code.
Adding a Inline Player does require some knowledge of HTML and CSS. You may wish to ↗️ ask our support team or your web developer to assist you.
Step by Step: Adding a ReelFlow Inline Player
- Prepare a clear Player insertion space on the page - the Target Element
- On your existing webpage, have your web designer create an empty
<div>exactly where you want the Player to appear inside. - Assign a unique ID to this div tag e.g.
<div id="reelflow-player-1"></div>. This ID will be how you identify the Target Element. - If you plan to insert multiple players on a page, each location needs its own div and unique ID.
- You can select an existing element with an ID, but it is often best to create dedicated ones for the greatest control of the layout.
- It is possible to use other types of HTML elements as your Target Elements other than a
<div>with an ID, but be aware changes to the page could affect their performance and reliablity as a target.
- On your existing webpage, have your web designer create an empty
- Keep the target element
<div>unstyled for flexibility and device responsiveness- Avoid applying fixed heights or widths to the target element
<div>. Let it fill the width of its container naturally, this allows the ReelFlow Player adapt to different screen sizes automatically. - Using Preview, you can check your webpage to confirm that the placeholder
<div>spans the full width of the column or section, for all mobile to desktop sizes you need to support.
- Avoid applying fixed heights or widths to the target element
- Use CSS for Fine-Tuning Size and Position
- After inserting the Player, apply your usual CSS styles to the page to adjust margins or other visual elements as needed.
- For more detailed guidance on positioning and setting dimensions of your Player using CSS, ↗️ we recommend you read our Inline Player positioning article.
- Advanced: you can override dimensions like width, height, max-width, max-height, min-width, min-height, and aspect ratio in the Flow Builder Activation tab. However,the ReelFlow Player is designed to be responsive as standard, and will resize to fill the space you provide. If you artificially constrain the height or width, it can impact the automatic-responsive resizing nature of the Player.
- You can get further guidance on ↗️ setting the dimensions of the Inline Player here.
- Things To Watch Out For
- Ensure each Target Element has a unique ID. Duplicate IDs in the HTML on the same page can confuse the ReelFlow Player.
- If your Target Element is hidden from sight by responsive CSS or JavaScript on the page, the ReelFlow Player visibility may be affected.
- Did you know? The IDs we use also serve as anchors you can scroll to - so visiting www.example.com/#reelflow-player-1 will scroll the visitor to the Inline Player.
- Set the Target Element in the Flow Builder & Publish
- In the Activation Tab of the Flow Builder, add the Target Element ID , e.g.
#reelflow-player-1- note you should enter a # before the ID, this is convention. - If you don't already have an Target Element ID you can use, speak to our team or your web developers to help you address this.
- Preview your Flow to see how it looks, and test the responsive nature of the page to ensure a good fit
- Publish to see the Flow appear
- In the Activation Tab of the Flow Builder, add the Target Element ID , e.g.
How the Inline Player fits into the Target Element
For more detailed instructions on adjusting the dimensions of a Target Element to suit a Inline Player, see this article: ↗️ Fine-tuning the dimensions of an Inline Player on a webpage.
Adjusting how the video fits inside the Player
To assist with ensuring inline video content is shown at its best, you can adjust the Video Fit, which can be set from the Activation tab in the Flow Builder. The choices are:
Optimized (default)
Best for videos focused on a single person, talking to camera. The video fills out the Player, and may crop left and right sides:
Reveal
Best for videos containing multiple subjects, or where the content is wide. The whole video will be visible, with no cropping left or right:
Best Practice for using Inline & Overlay Players on the same page
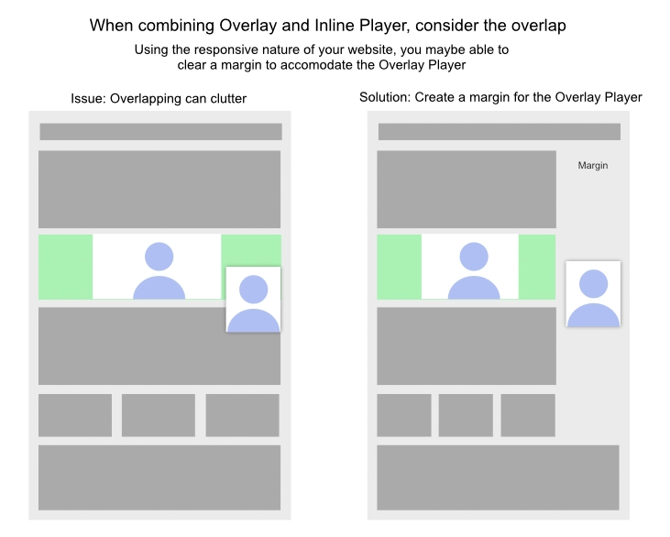
When applying a combination of Overlay type Player and Inline type Players on a page, consider that overlapping video can be distracting.
If you have the space to create a permanent margin on the Overlay side of the page, it can create space to avoid Player overlap.